
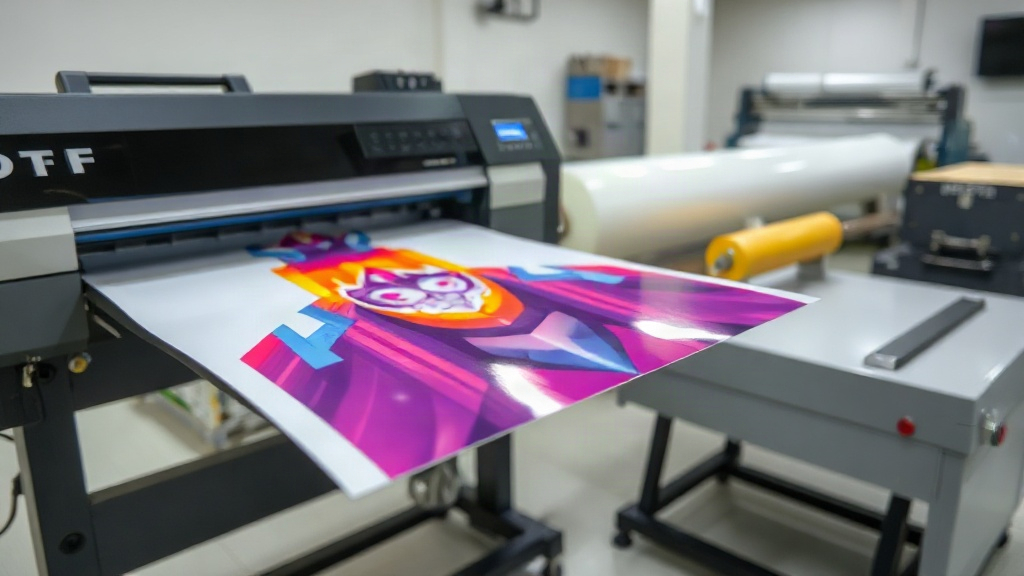
If you've been searching for a way to print vibrant, full-color designs on t-shirts without the hassle of weeding or the expense of screens, DTF transfer printing might be exactly what you need. Unlike traditional methods that require multiple steps and specialized equipment, DTF (Direct to Film) printing simplifies the process while delivering professional results. In this guide, we'll walk you through everything you need to know about DTF printing, from the basics to advanced tips, so you can decide if it's right for your business or hobby.
What Is DTF Transfer Printing?
DTF stands for Direct to Film. It's a printing technology where your design is printed onto a special film, coated with a powdered adhesive, and then heat-pressed onto fabric. The result is a soft, stretchable, and durable print that bonds permanently to the material. Unlike DTG (Direct to Garment) printing, which prints directly onto the fabric, DTF uses a transfer film, allowing you to print on a wider range of fabrics, including cotton, polyester, blends, and even nylon.
How Does DTF Printing Work?
The DTF process involves several key steps:
- Design Preparation: Your artwork is prepared in a graphics program, ensuring it's mirrored and sized correctly.
- Printing: A specialized DTF printer lays down a layer of white ink (if needed) followed by CMYK colors onto a PET film.
- Powder Application: While the ink is still wet, a hot-melt adhesive powder is sprinkled over the film.
- Curing: The film passes through a curing oven or heat press to melt the powder, creating a dry, tacky surface.
- Transfer: The film is placed on the garment and heat-pressed. After cooling, the film is peeled away, leaving the design bonded to the fabric.
This process might sound complex, but with the right equipment, it becomes second nature. The beauty of DTF is that it allows for high-detail, multi-color designs without the setup costs of screen printing.
Why Choose DTF Over Other Printing Methods?
There are several reasons why DTF printing has gained popularity among apparel decorators:
- Versatility: Works on almost any fabric, including dark and light colors, without pre-treatment.
- Durability: Prints resist cracking, peeling, and fading, even after multiple washes.
- Detail: Captures fine lines, gradients, and photographic images with ease.
- Cost-Effective: Low startup costs compared to screen printing, and no minimum order quantities.
- Speed: Once the film is prepared, pressing is quick, making it ideal for small batches and custom orders.
Whether you're running a print-on-demand shop or a small custom apparel business, DTF offers flexibility that other methods can't match.
Getting Started with DTF Printing
If you're ready to dive into DTF printing, here's what you'll need:
Essential Equipment
- DTF Printer: A dedicated printer that uses DTF inks and can handle white ink. Brands like Epson with DTF conversions or purpose-built printers are common.
- DTF Film: PET film designed for DTF printing, available in sheets or rolls.
- Adhesive Powder: Hot-melt powder that bonds the ink to the fabric.
- Curing Oven or Heat Press: To melt the powder and later transfer the design.
- Heat Press: For applying the transfer to the garment.
- RIP Software: To manage color profiles and print settings.
While the initial investment can be a few thousand dollars, it quickly pays off if you're producing a steady volume of shirts.
Step-by-Step DTF Printing Process
- Create Your Design: Use graphic software to prepare your artwork. Remember to mirror the image.
- Print on Film: Load the DTF film into your printer and print the design. Ensure the printer is set to the correct ink configuration.
- Apply Powder: While the ink is wet, sprinkle the adhesive powder evenly over the print. Shake off excess.
- Cure the Film: Place the film in a curing oven or under a heat press for the recommended time and temperature (usually around 160°C for 2-3 minutes).
- Press onto Garment: Preheat your heat press to the required temperature (typically 150-160°C). Place the film on the garment, press for 10-15 seconds with medium pressure.
- Peel and Enjoy: Wait for the transfer to cool (or peel hot, depending on the film), then remove the film. Your custom apparel is ready!
Common Challenges and How to Overcome Them
Like any printing method, DTF has its quirks. Here are some common issues and solutions:
- Clogged Printheads: Regular maintenance and daily printing can prevent clogs. Use a cleaning solution and follow the printer's maintenance schedule.
- Poor Adhesion: Ensure the powder is applied evenly and cured properly. Also, check that the fabric is clean and free of wrinkles.
- Color Accuracy: Use ICC profiles and calibrate your printer regularly to maintain consistent colors.
- Film Curling: Store film in a dry place and avoid excessive humidity. Use a film holder during printing.
With practice, you'll learn to troubleshoot these issues quickly.
DTF vs. Other Printing Methods: A Comparison
To help you decide, here's a quick comparison:
- DTF vs. DTG: DTF works on more fabrics, requires less pre-treatment, and often has better durability. DTG is simpler for cotton but limited in color vibrancy on dark shirts.
- DTF vs. Screen Printing: Screen printing is cost-effective for large orders but requires setup and is limited in colors. DTF is better for small batches and complex designs.
- DTF vs. Vinyl: Vinyl is great for simple, single-color designs but can't handle gradients or photos. DTF excels at detailed, multi-color prints.
Tips for Success with DTF Printing
- Start with Quality Materials: Not all films and powders are created equal. Invest in reputable brands for consistent results.
- Master Your Heat Press: Temperature, pressure, and time are critical. Use a heat press with accurate controls and test frequently.
- Keep Learning: Join online communities and forums to share tips and troubleshoot with other DTF printers.
- Offer Samples: If you're selling, provide samples to customers to showcase the quality and durability of your DTF prints.
Frequently Asked Questions
What fabrics can I use with DTF printing?
DTF transfers work on a wide range of fabrics, including cotton, polyester, cotton-poly blends, nylon, and even leather. However, fabrics with a rough texture or heavy coating may require testing to ensure proper adhesion.
How durable are DTF prints?
When applied correctly, DTF prints are highly durable. They resist cracking, peeling, and fading, and can withstand dozens of washes. For best results, wash garments inside out in cold water and avoid harsh detergents.
Do I need a special printer for DTF?
Yes, you need a printer that supports DTF inks, particularly white ink. Many Epson printers can be converted, or you can buy a dedicated DTF printer. It's essential to use DTF-specific inks and films for optimal results.
Can I print on dark shirts without a white base?
No, for dark garments, you must print a white ink layer under the colors. DTF printers automatically handle this if your design includes white. The white layer ensures the colors pop and remain vibrant.
How much does it cost to start DTF printing?
Startup costs vary. A basic DTF printer can cost around $2,000-$5,000, plus supplies like film, powder, and ink. You'll also need a heat press and possibly a curing oven. However, the low cost per print makes it profitable for small businesses.
With its versatility, durability, and ease of use, DTF printing is revolutionizing the custom apparel industry. Whether you're a hobbyist or a business owner, mastering DTF can open up new opportunities for creativity and profit. So why not give it a try? Your next best-selling shirt might be just a transfer away.